How To Use A Wood Burning Tool To Write

Wood Burning Tips Wood Burning Crafts Wood Burning Patterns

Diy Wood Burning How To Tips Project Patterns Wood Burning Techniques Wood Burning Crafts Wood Burning Stencils

Burn Baby Burn Wood Burning 101 Wood Burning Crafts Woodburning Diy Wood Burning Art

Step By Step Instructions On Creative Woodburning Wood Burning Crafts Wood Burning Art Pyrography Designs

An Innovative Safe Way To Wood Burn Available On Amazon Prime Visit Us On Facebook An Instagram Scorchmarke Wood Crafts Diy Write On Wood Wood Burning Tool

Pin On Tipps Tricks Diy

The DA is equivalent to 2 D tips and the DG is equivalent to 2 G tips.
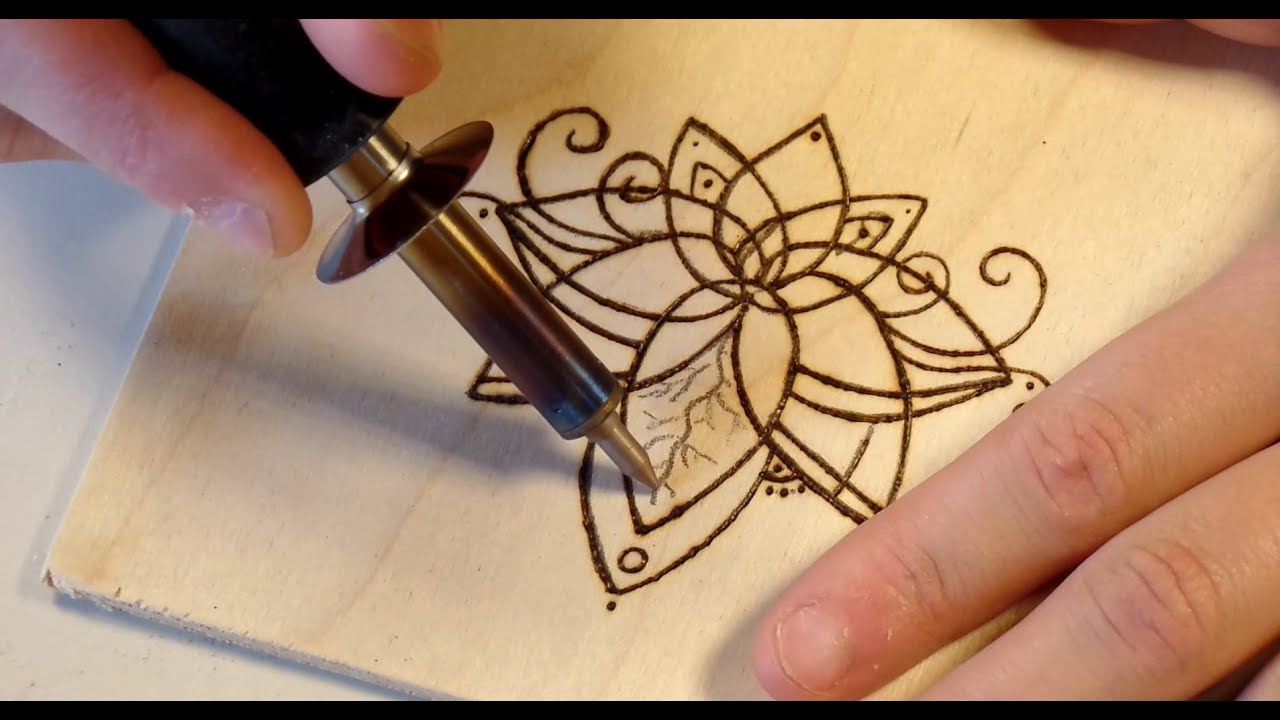
How to use a wood burning tool to write. However you can play with the amount of pressure you use on the surface to get different effects in the wood burning. The next step is burning. A pen-shaped wood burner gives a distinct shape and color to the engraved letters on planks of wood and is easy to use for first-time engravers.
Beginner Strokes to Try Create a fine line controlled with the point of the pen. Use the very tip to create small dots that add texture. This amount of lettering takes a while to burn.
Place transfer paper between the pattern and the wood and trace the lines of the pattern with a pencil or ballpoint pen to create the design on the wood. How to Wood Burn Letters for Beginners. Get use to the tool and gliding it along the surface.
Shade with light circular motions with your pen using more of the side of your tool. Formerly somewhat imprecise due to the unavailability of instruments fire-writing work today is much easier due to the advent of electricity and. The woodburning pen is built to make your job easy.
Let the Burning Letters Begin. Woodburning or pyrography literally fire writing is a craft that stretches back surprisingly far through history. Add boldness and depth by holding the tool down longer in place on your wood.
Create Wood-Burning Designs To transfer a design first print and if necessary assemble the paper pattern. Hold the wood burner firmly but press on the wood lightly. Push harder and then use a lighter touch.

The Wire Nib Pyrography Pen The Rolls Royce Of Woodburning Tools Wood Burning Patterns Stencil Wood Craft Patterns Wood Burning

Issuu Is A Digital Publishing Platform That Makes It Simple To Publish Magazines Catalogs Wood Burning Techniques Beginner Wood Burning Wood Burning Stencils
Walnut Hollow Wood Burning For Beginners Using The Creative Versa Tool Youtube Wood Burning Crafts Wood Burning Stencils Walnut Hollow Wood Burning

Burn Baby Burn Wood Burning 101 Wood Burning Tips Wood Burning Tool Wood Burn Spoons

Dotted Sunflower Centre Wood Burning Crafts Wood Burning Art Wood Burning Techniques

Pyrography Patterns For Beginners Step By Step Instructions On How To Choose Your Design An Wood Burning Patterns Wood Burning Techniques Pyrography Patterns

My Mushroom Pyrography Woodburningprojects Wood Burning Patterns Stencil Wood Burning Art Wood Burning Patterns

And Please Don T Write Your Name In The Dust Homemade Signs Wood Burning Crafts Diy Wooden Crate

Learn To Burn Excerpt Wood Burning Techniques Wood Burning Crafts Wood Burning Tips
How To Wood Burn With The Singe Quill We R Memory Keepers Youtube We R Memory Keepers Wood Burning Quilling
Wood Burning 4 Baby Sparrows Wood Burning Crafts Wood Burn Designs Wood Burning Art

The 22 Most Beautiful Wood Burning Patterns Wood Burning Stencils Wood Burning Patterns Stencil Stencil Wood

Sara S First Wood Burning Beginner Wood Burning Wood Burning Patterns Woodburning Projects

